2004 Ed "Big Daddy" Roth Superfink Re-issue

2004 Ed "Big Daddy" Roth Superfink Re-Issue
Here we have another in the Ed Roth Series of Fink kits that were originally released in the 60's and, fortunately for nutty fans like me, have been re-released
 in the new millenium. Talk about your staying power. This kit, Superfink, was first released 40 YEARS AGO!! I love these Roth kits and I've built alot of 'em, so this lil' job, for a fella' out in Sin City - Las Vegas, should be a walk in the park compared to the Aurora Sabertooth kit. So like good lil' soldiers we're gonna' empty out the contents of ye olde kit and dump 'em on the workbench. Sort out the parts and make sure everything is here, and, of course, study the instructions to begin planning our assault on this awesome retro Roth kit. It's like my daddy used to tell me, "son, plan yer' work, than work yer plan". Sound advice, huh? Let's get to it now!
Part Uno: Gluin', Puttyin', Sandin' and Primin'!
Ever have one of the moments where time just got away from you? You know, you're in the middle of doin' something and you look up at the clock to see that HOURS have passed and you didn't even know it?!? Well, that happened to me, only I was lookin' up at a calendar to see that MONTHS had passed!!! Too tripped out, and not even an alien abduction to blame.................so, now I rejoin my own blog-o rama already in progress.
Like all good lil' kits, we start by plannin' our work. First step: cut all parts away from parts tree and shave with the X-Acto knife to remove all molding burrs and skin tags. Next: match up major pieces to check fit, molding imperfections, and plot out what parts can be glued prior to priming. Then: glue all pieces together that won't inhibit future painting, or make it so difficult to do that you want to hurl the kit across the room.
 Yeah, now that's lookin' pretty ripe for primin', huh? Notice also in the illustration the tools of the trade, so to speak. X-Acto Knife, Super Glue and Insta-Set, needle nose pliers (if you've ever glued your fingers together with Super-Glue then you KNOW what the pliers are for!), and, this is a big one, INSTRUCTIONS!!! No matter how simple the job, how few the parts, or how awesome you are as a kit builder, these little babies have a purpose and can save you from some frustrating moments in your pursuit of modeling happiness. Study them thoroughly BEFORE you begin to do anything!!
 Now that we're deliriously happy with that phase we go on out into the garage and prime up all them parts with a nice light grey tone. Me, I'm partial to Design Master Primer, you can get this stuff at any Michael's or A.C. Moore craft center.
Part Two: Pre-Putty Assembly, Then on to Puttyville!
Once the primed parts are dry, its time to do a bit of major part pre-assembly. Again, much like our first pass, we don't want to put together more of the kit than we will be able to paint well later on. So, take a look at the pic here and you can see that this kit is a simple one with few parts, the main part being the ol' finkster himself. So I go ahead and decide to put him together BUT, and this is a big one, first I prepaint the mouth portion because it has to be glued inside the front body half PRIOR to gluing the two halves together. Later, it would be too difficult to paint once inside the body. So this lil' move saves us some aggravation later. ALSO, with these Roth kits, you have to remember that the arms are designed to pivot in the sockets, so they too have to be installed prior to gluing the two body halves together.
 Remember those instructions? Well these are a few steps that are easy to miss in your zeal to make some progress on the kit. I can't tell you the number of times I've had to break a kit apart to go back and install these items. Haste, it is said, makes waste. So plan your work. Once all my major portions are pre-assembled, I use the X-Acto knife to scrape the seams to ensure that they are even. In these old styrene kits there are plenty of imperfections that you have to compensate for in order to achieve that "pro modeler" look that'll make YOU the coolest kid on the block. AAhhhhhh, there, all primed, glued and scaped and ready to pound the putty!!
Part III: It's the Lil' things at first!
As I have been known to preach from ye great modeling pulpit, tis best to loosen your chops on the small things first before moving onto the main event. I know what yer thinkin'; "just what the hell are you talkin' about there, Cal?!?". And I'm glad you asked, mainly what I mean is that I tend to start my paintin' portions off on the incidental accessories that a kit may contain. In this particular case, that would be the skateboard apparatus. When gearing up to paint a kit you kinda need to get into the Zen of the moment, and a good way to get yer mind right is to polish up your paintin' chops on some smaller
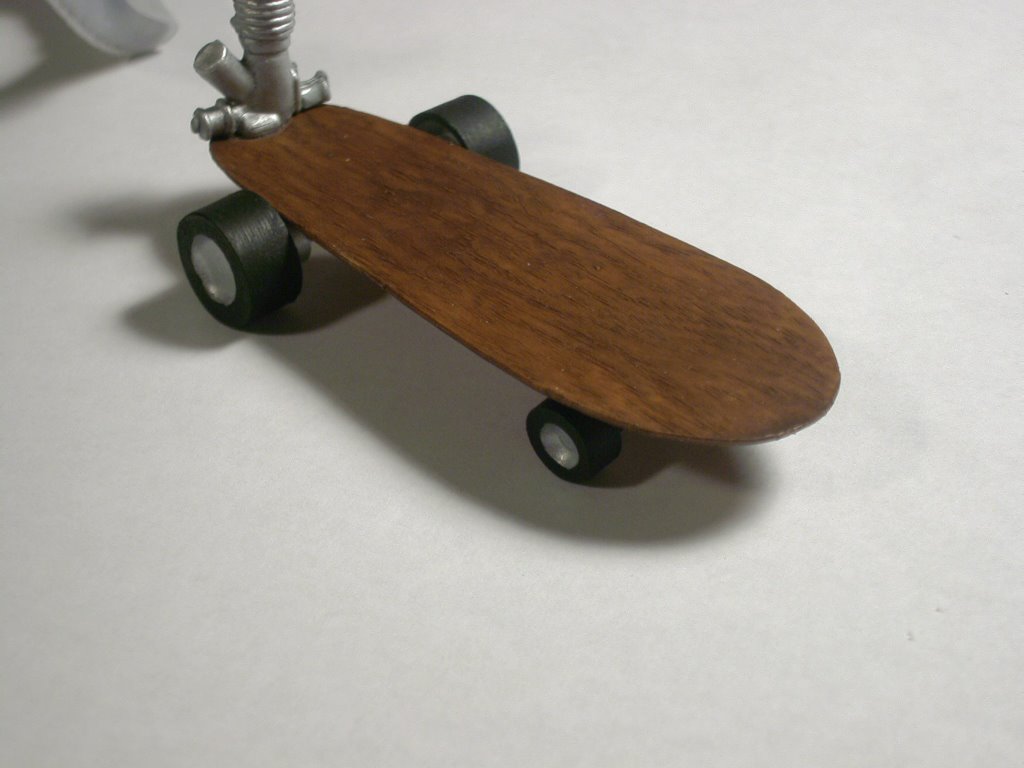 parts of the kit. Call it the subtle psychology of the bench, a confidence building mental prep akin to athletes "visualizing" their next contest. Just check out the dandy brush and paint work on the ol' wheelie board and
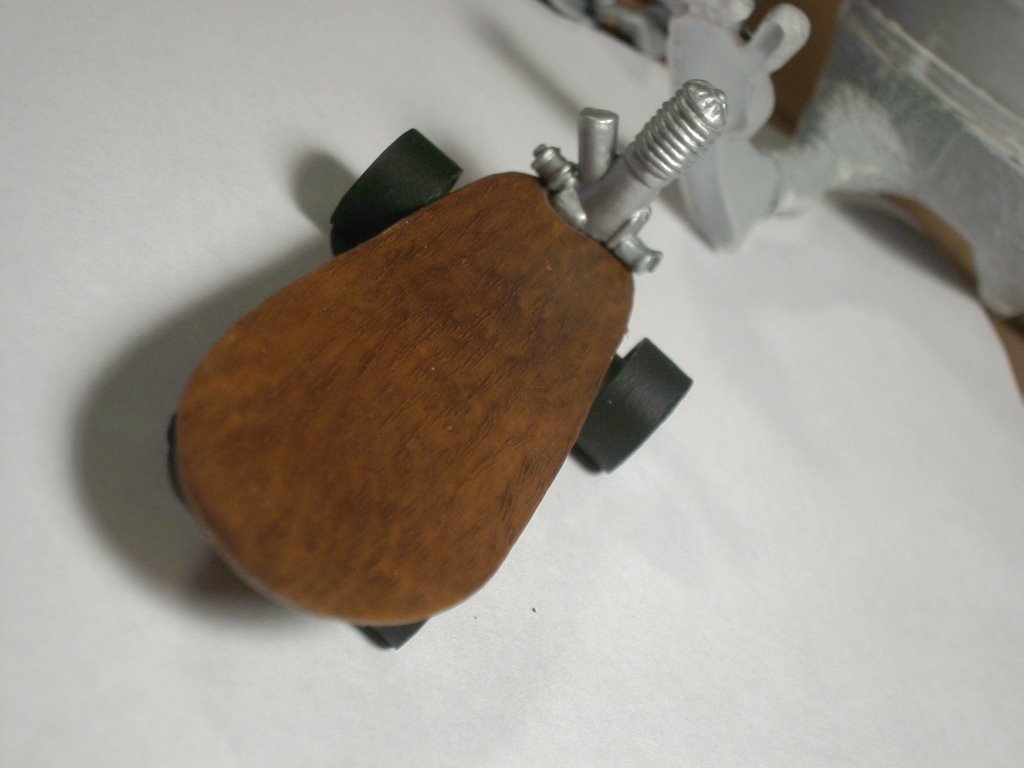 tell me that we're not excitied about movin' on to the Finkster himself!! Dig the grain in the wood and the crud detail in the cylinder head!! I tell ya', its the lil' things that make the BIG impression. Next, we tackle the cape, the hillbilly hat, and put the main body color base coat on. For the Hat and Cape I'm grabbin' my can of Design Master Deep Blue. It looks just like the kit build up they show on the box, and since that's the template I'm usin' to paint up
 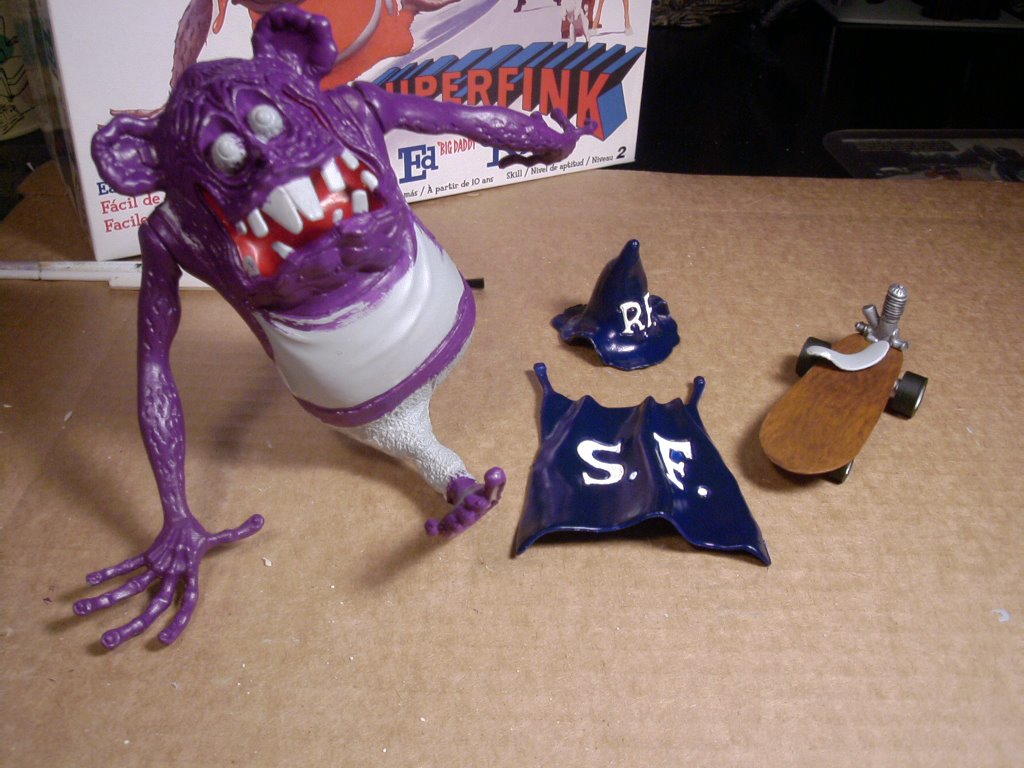 MY kit, I'm happy with the results. Now, painting those pesky "R.F.'s" is gonna' require patience, Liquitex Titanium White and one skinny brush. I paint in the raised areas of the letters and then, just to clean things up a bit, I outline the recessed areas surrounding the letters with a Staples Opti-Flow Black Gel Pen. This makes the letters look pro,
 and hides my shakey paint job!! Boy Howdy, that's a good lookin' cape and hat!! Now, just to get the juices flowing fast for the main event, I lather on a coat of Liquitex High Viscosity Prism Violet on the body areas of Superfink. The easy parts are now done and it's time to take on the task of bringing LIFE to this timeless Ed Roth Classic.
Part 4: Topography - Recesses and Excesses
Here's the deal with these Roth kits: he puts a heck of alot of wrinkles, folds, divots, dimples and lines in the skin of his hot rod monsters. And, in order to really accentuate all this detail and make the kit pop, you've got to employ some simple yet devilishly effective techniques. Now we already have our base coat so the first step is to lighten our base coat color, just a couple of shades or so, with some white paint. Then proceed to dry brush the kit. Right away you begin to see how
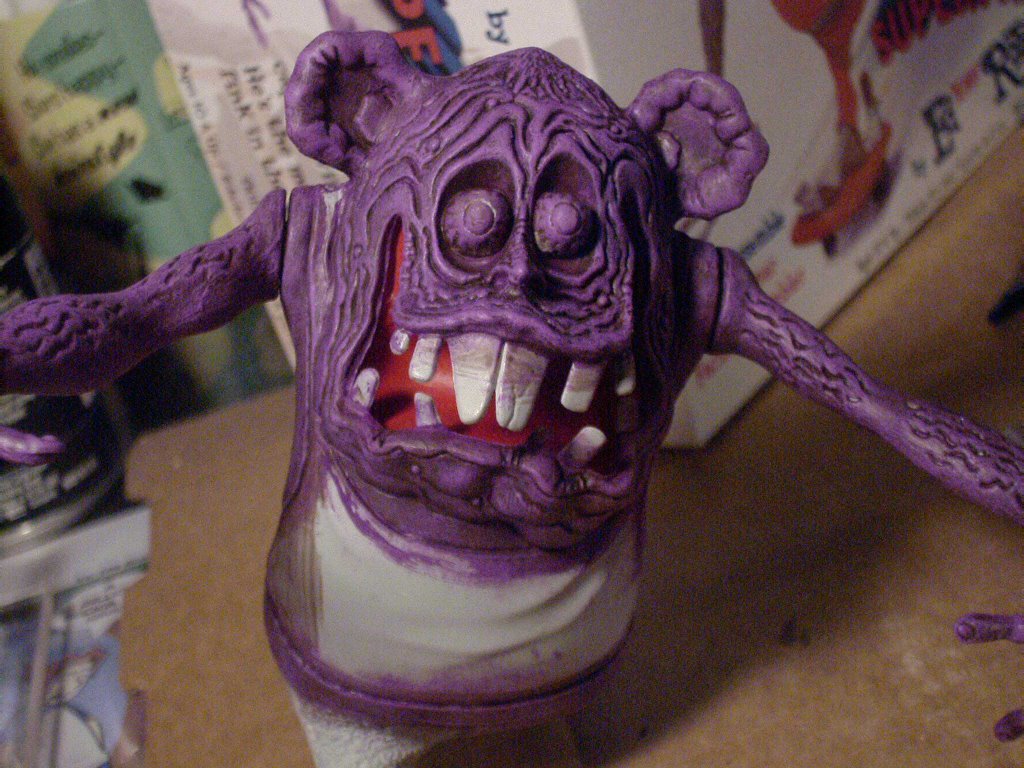 this is going to bring out the detail. But to really get it goin' on you have to layer up techniques so after my first pass at dry brushing, I break out my brown wash and wash the whole surface making sure that the dark color gets into all the lines and creases. Me, I work in small areas at a time using a blow dryer to speed up the evaporation of the wash from the higher surface areas. After a pass of the wash, you got it, back to the dry brush. Take the lighter shade that we used for the first pass and lighten in again with some white and repeat the process. My, my, my, that is lookin' sharp, I like what I see and I've learned the hard way that this is about the time I should seal up my work so far in case I mess up later. So out with the Testor's Dull Cote, give 'er a blast, and when it dries I'll probably hit the whole thing with one more layer of wash and dry brush.
Part 5: The Home Stretch - Kickin' in those finishing touches
It's at this point in the kit when you're overwhelmed with two distinctly different points of view. One: Good lord, will this build up never end!!?!, and Two: Great gravy, I'm almost done with this kit and it looks bitchin'!! Now, there's never a detail too small to consider when trying to achieve the nirvana of figure modeling, so the task here is to not be too taken over by either of the aforementioned emotions. In other words don't rush to the end skipping important details that will make your build up "pop"! With that in mind, I spend a silly amount of time just doin' the 3/4 square inch plot of hair on Superfinks head. I start by carefully coloring in the area with Liquitex Butter Yellow. Then I go back to my brown wash ( that we did the rest of the kit with) and hit a coat on the hair to bring out the strand lines. This darkens the hair up a bit
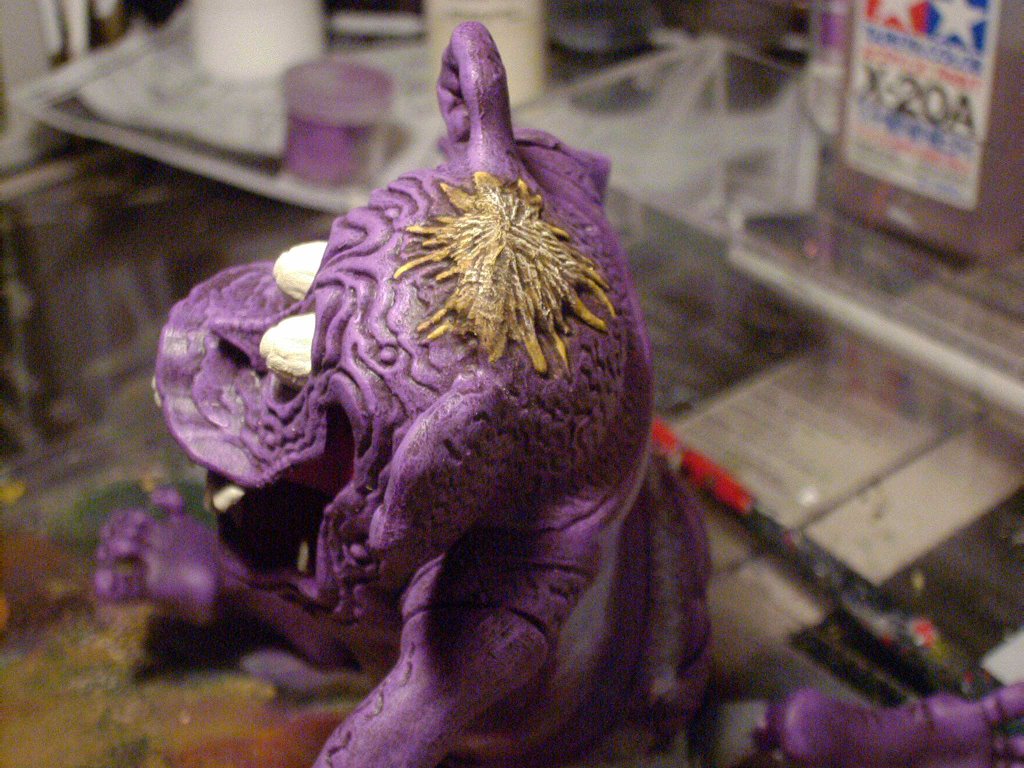 much, so I go back with a light drybrush coat of the Butter Yellow, and an even lighter drybrush coat of Liquitex Antique White. Looks fab, right? Bear in mind that this entire area will be covered up by Superfink's hat!!! Now, am I anal, or what? Next since I've already opened the Antique White and I'm a strong believer in being expeditious with your effort, I
 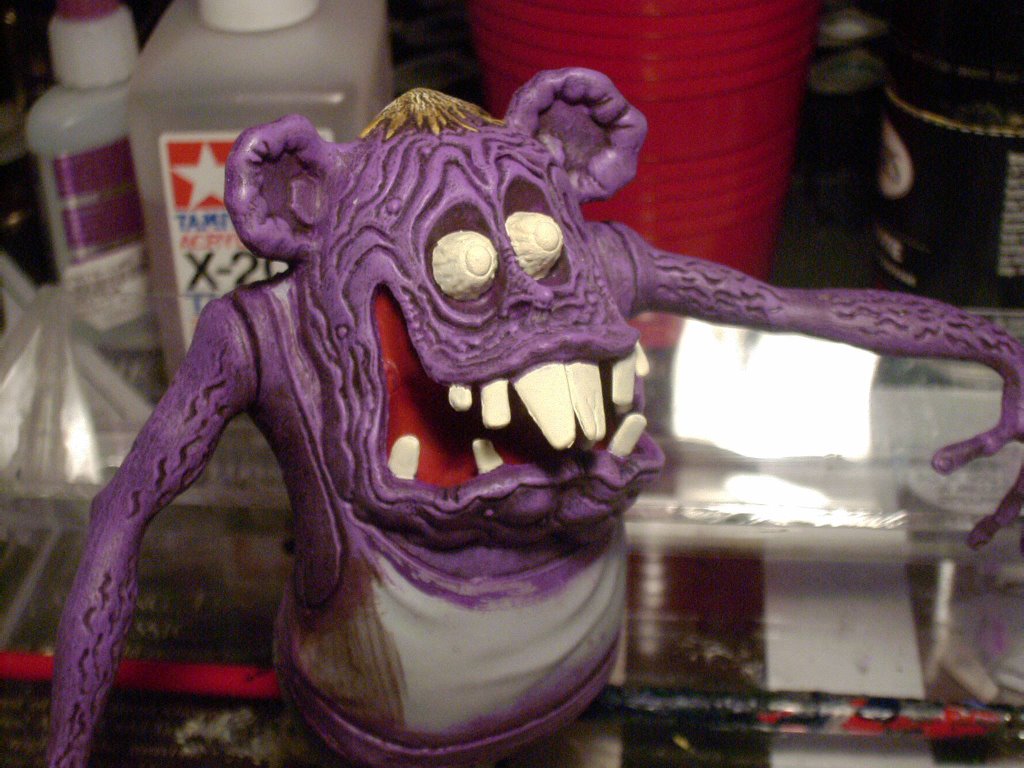 take a first pass at the eyes and teeth. A couple of coats does the trick, and now I've got to address the details of both areas. It never ceases to amaze me how suddenly a kit finishes after weeks, or in this case months, of what seem to be slow or no progress. You get to the home stretch and BAM! The whole thing just seems to fall down like dominoes. So let me see if I can just as quickly sum up my finishing moves. Just to make sure I don't screw up any of my super cool body paint job, I decide to grab a Le Plume Red Marker. The brush tip helps it apply just like paint and a brush but with the added control of a steady hand using a pen! I use this to outline all the outer edges of Superfink's tank top and long-johns. Now I go back with a flat edge brush and some Delta Ceramcoat Bright Red and fill in the large areas. Once done, I grab a smaller flat edge brush and carefully go back over all the penned in outlines to insure that the color matches. A couple more light coats over the entire suit area and his dud's are lookin' sharp. Then with a Staples Opti-Flow Black Gel Pen I detail in the crack in the front tooth and blacken in the pupils of the eyes. Back to the Le Plume Marker, but this time with the extra fine tip, I detail out the veins in the eyeballs. At this point I notice I've completely forgotten about Superfinks tongue and it's laying there it all it's primer glory. Quickly hit that with a base coat of Liquitex Burgundy, dry it with a blow dryer, dry brush it with a lighter layer of the Delta Ceramcoat Bright Red, and that bad boy is ready for insertion into that gaping yap of Superfinks's. Now, being a perfectionist, as well as a glutton for painting punishment, I temp fate by decided to add some dimension to the red outfit. I need it took look a tad more orange like on the box art that I have been using as my color guide. Get out the Liquitex Cadmium Yellow and dry brush the entire suit area, being careful not to slop it all over my groovy body paint job. PERFECT! Just the effect I was lookin' for. Now while I've got the yellow out, I dip the brush in some water and wash the yellow over those teeth to give them that much sought after pre-rotting color that all the kids are ravin' about! Well, you know what time it is now folks. we gonna' Dullcoter the entire kit and move on to this final assembly. As the
  pictures testify, this was a kit long in the makin', but worth every hour. No matter how simple the kit, I always try to make it special.
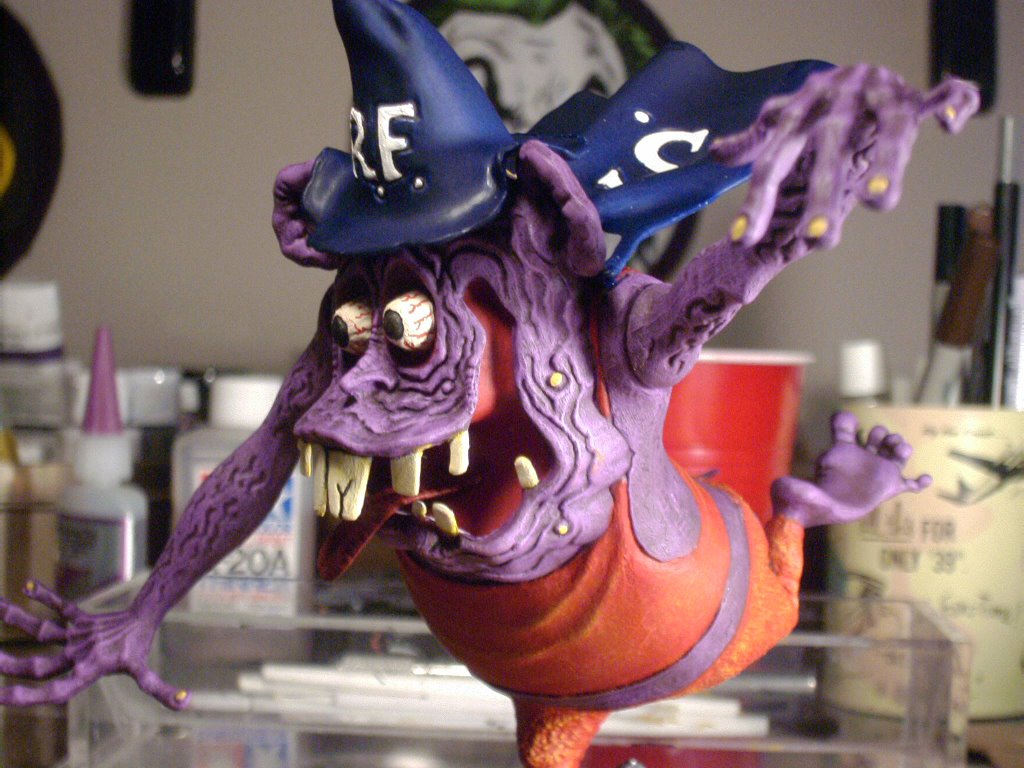 This adds to the fun of building and to the excitement of honing my mad kit building skills!! See ya next time when we tackle the 1972 Aurora Cromagnon Man, the companion piece to the Sabertooth Tiger kit that I built last year.
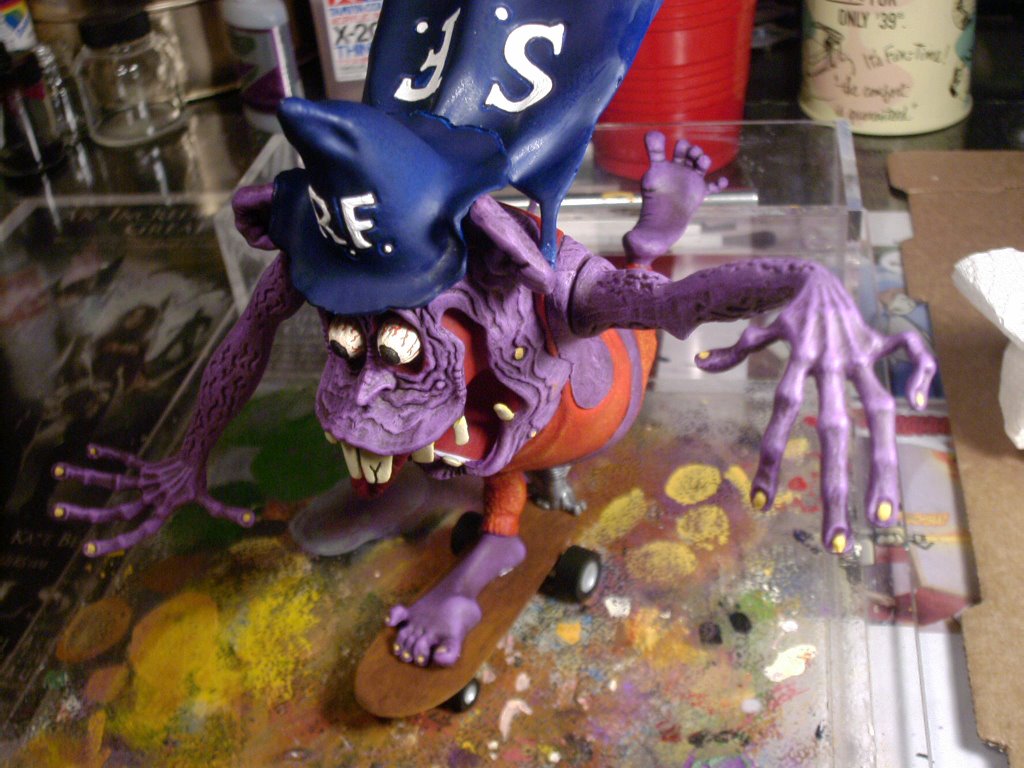


Labels: Figure Model Building and Painting., Hobby Modeling, Model Kit building
posted by Cal's Models at 1:58 PM
0 comments
![]()

