1972 Aurora Saber Tooth Tiger & Cromagnon Man

Hey, Kids! This is the first installment of a new series I’m doing that’ll feature commission build ups I do for other modeling nuts out there. Ain’t that something? Only a few short years ago, here I was, a babe in the woods just learning about acrylic paints and vinyl kits. Now look at me, actually getting folks to trust me with their treasured grail items. And I take it seriously. I know what my kits mean to me, so I will focus that energy times 10 on these kits build ups for clients. Two months ago I built Ed Roth’s Scuz Fink for a client, and it came out better then the one I built for myself. That was my first commissioned job. So here begins another chapter in my hobby. To keep me honest, I’m going to be documenting all the build ups here, this will make it easy for the client to see what’s happening with their kit, nearly in real time, and give me a chance to see what kind of time I need to devote to each build up. Since I have never considered myself a pro at this, I am reluctant to charge rates that I see out there on the web by other commissioned hobbyists. So, in net documenting the build ups, I can better zero in on my rates. There’s the prologue, now let’s get to it!!!!!
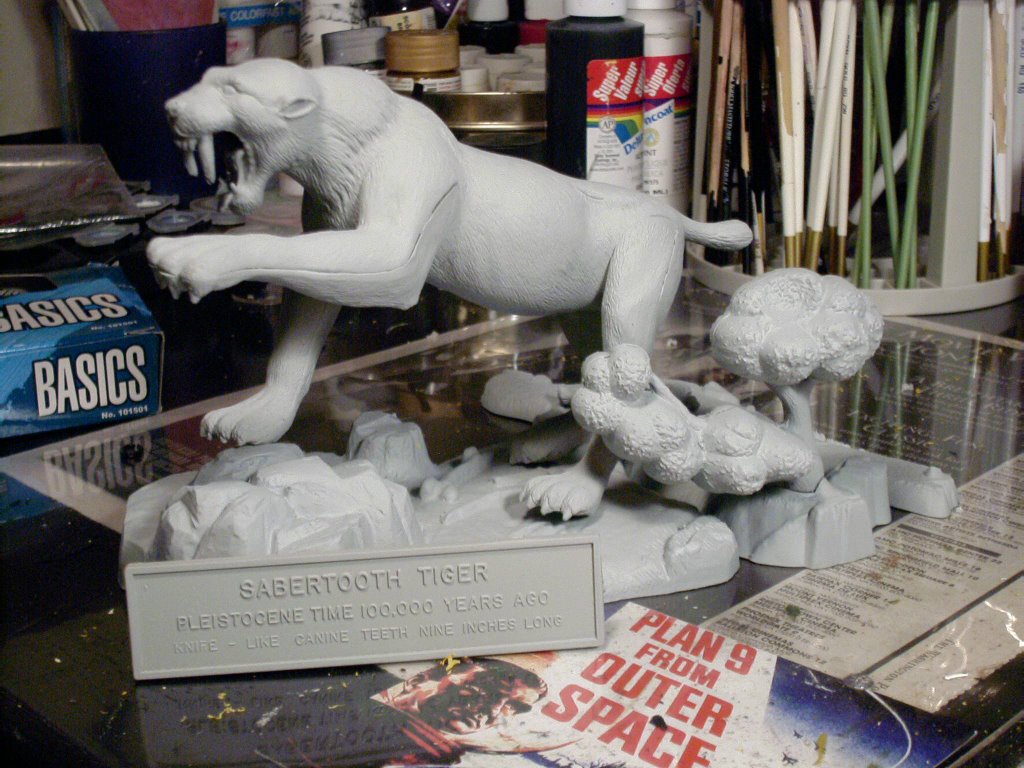
First Up: 1972 Aurora Saber Tooth Tiger and Cro Magnon Man
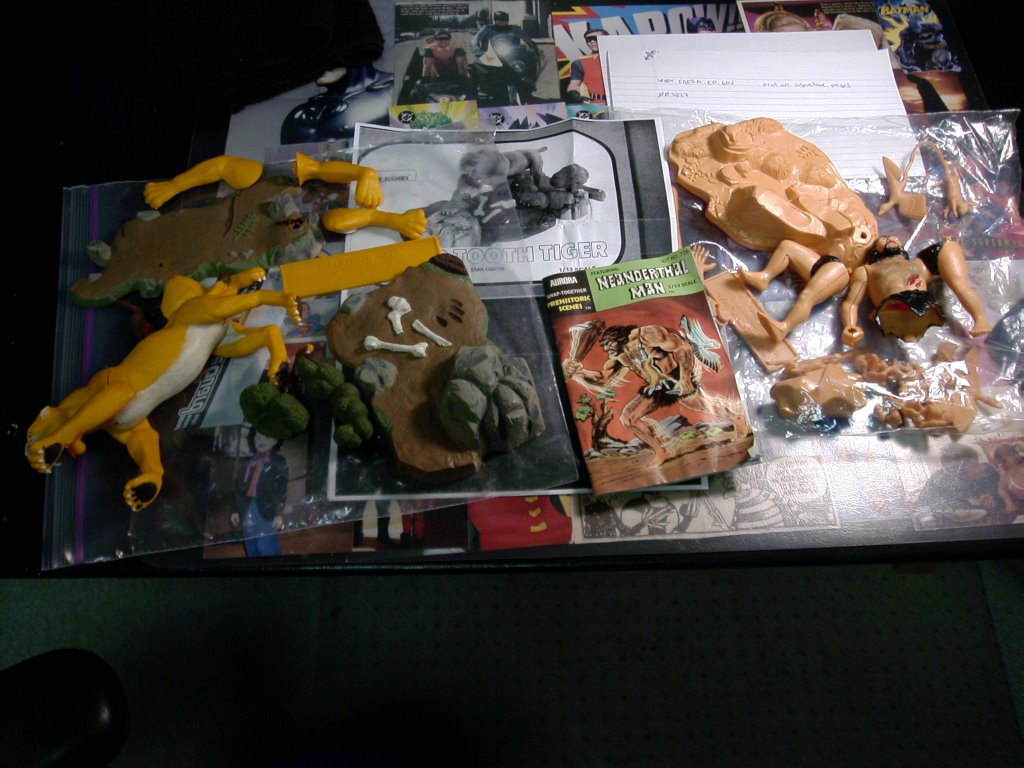 This is a rare opportunity for me, as I kid I never paid any attention to the Prehistoric Scene line of Aurora kits. Most likely because by the time the hit, I was well out of my first phase of model building, in high school, and chasing girls. Well, that’s not really plural on the “girls” since I pretty much dated the same girl for all three years of high school, but that’s another story for another column. Anyway, these kits were the snap together variety that were low on details, but did throw in some added bonuses like additional sets of legs to allow you to set up different poses for the same kit. This of course only an option if you don’t glue the kits and hide the seams. My client wants these kits to look pro, so I’m going all out, my goal is to make them look like mini-stautuettes. Check out the pictures, looks like the aftermath of a Fred Flintstone road kill!!!
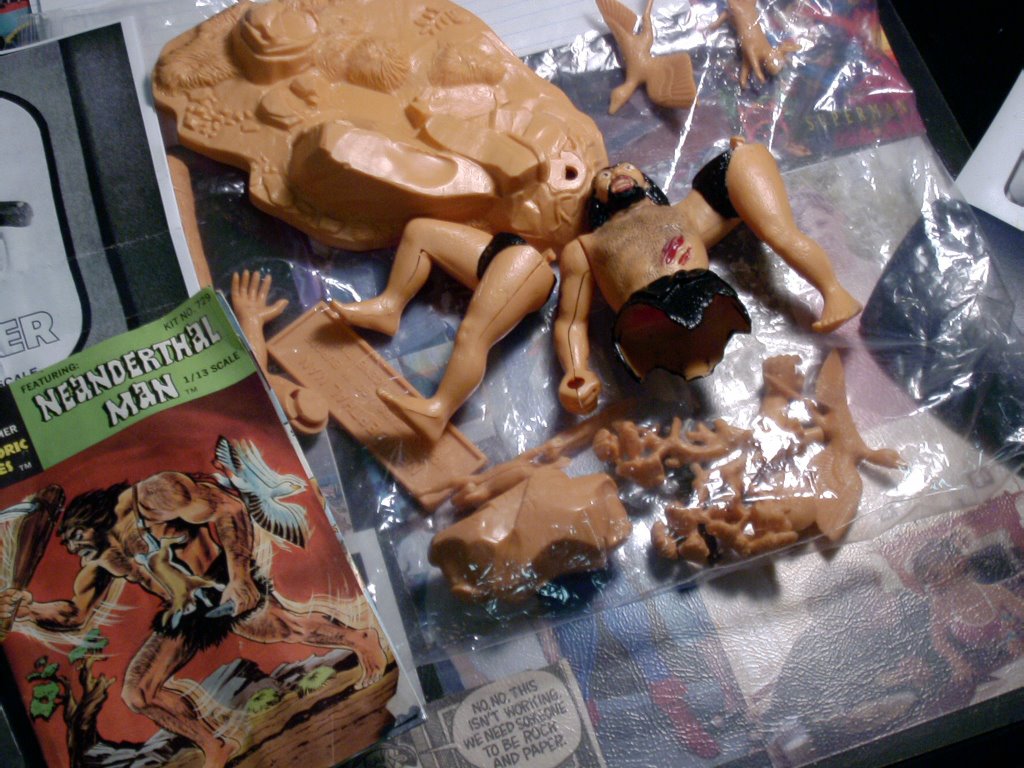
 See what I mean? Well, this is how I got the kit, partially assembled and painted, in Glad Freezer bags.......but the fella was kind enough to send me some photocopies of the original Instructions pages so I'd have a starting off point for putting together this seemingly pointless assembledge of parts!! Can't wait to get 'er going on.
Part I: Figuring out what you've got, how it fits, and priming that thing!
 Because I recieved this kit(s) as a partial build up, I wanted to take it back to basics, as if I had just opened the box like a wide eyed kid in 1972. So first, I separate all the parts into the original pre-glued pieces. Then I take my trusty X-Acto knife and "shave" all the parts. I do this to remove any burrs or imperfections or "tags" where the pieces were originally attached to the parts trees. This way when I go to glue them, I will have clean seams, smooth lines, and less to worry about at the putty stage!
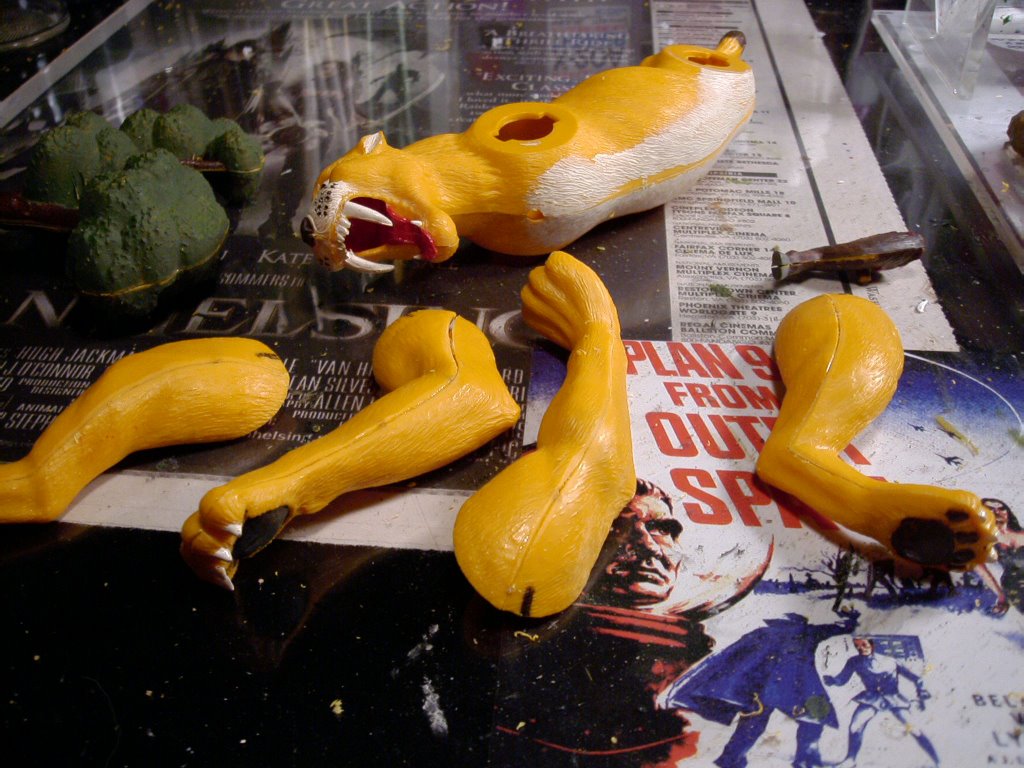
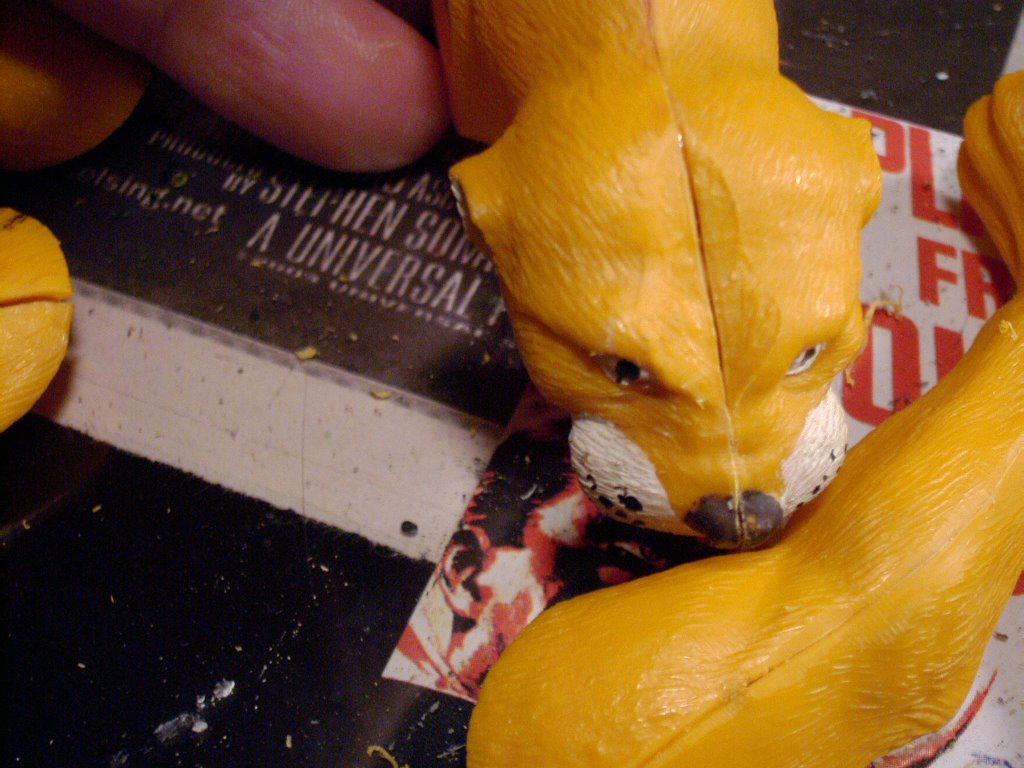
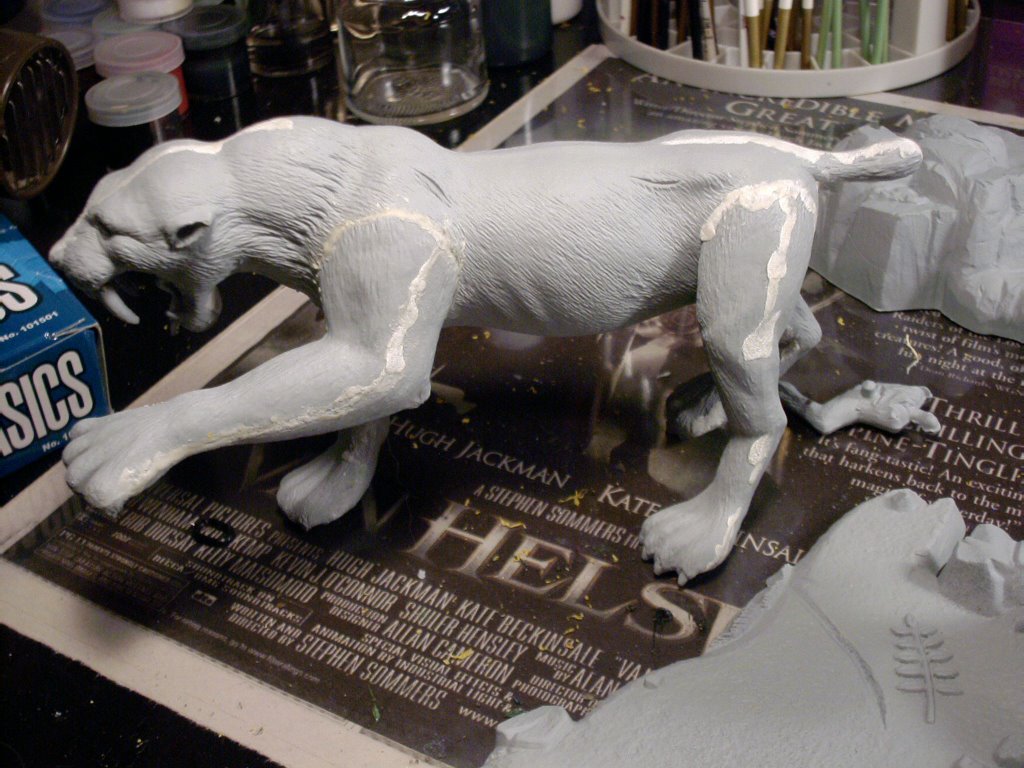
Now comes glue time. I'm gonna' grab my brand spankin' new bottle of Insta-Cure+ and my spray bottle of Insta-Set and start joining the major body parts together. Once this is done, I take the ol' X-Acto knife and take one more pass over the seams to make sure that the newly glued together pieces are as flush as I can get them prior to puttying. You can see that this part of the process is revealing the ol' classic Aurora inexact casting problem. In other words the parts don't fit cleanly together and are leaving some rather unsightly seams that are gonna' need some serious fillin' if we want this kit to look like the pro's d
 id it, AND WE DO!!
As you can see with these two pictures, the gaps are gonna' be a challenge. We'll get into how, what and why after we get done with the priming stage.
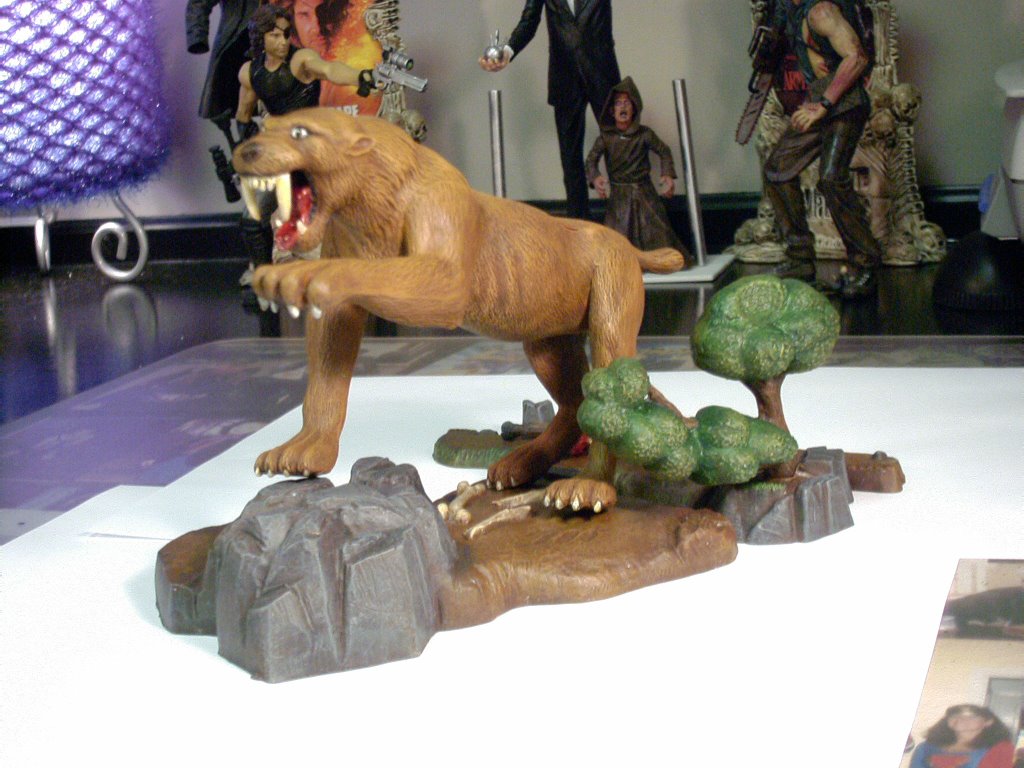
Because this kit was designed have replaceable and moveable parts, the legs don't totally match up, but my client wants this kit to end up like a statue so I have to permanently glue one set of legs on to the body so I can putty it up for painting. I have chosen the standing attack set of legs

 as opposed to the crouched set. Who wants a crouching Saber Tooth Tiger anyway? In order to establish the correct pose before gluing the legs on, I snap the legs into place and position the tiger on the base. A few minor adjustments and I have the pose I think is the best. Now, so I don't glue the legs on wrong, I mark the positioning with a marker. This way after I remove them to apply the glue I'll be sure to get them back in the same position that works best with the base. Pretty darn clever, huh??
Part 2: Ready for prime time!
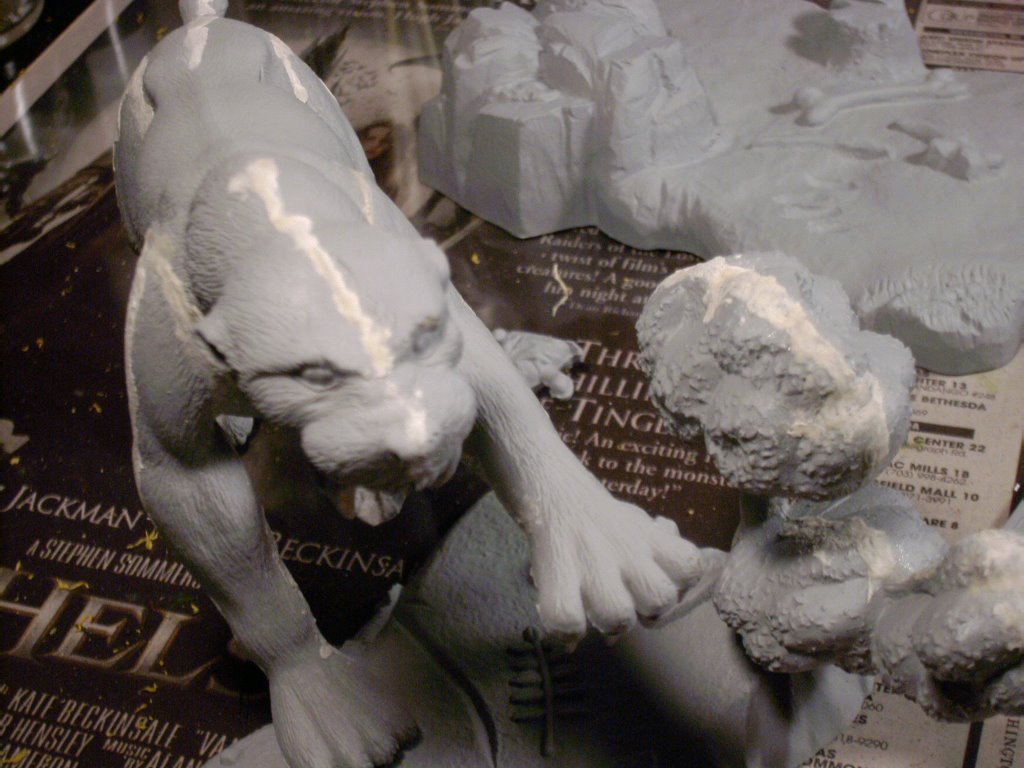
Here's the part where we take our major assembly pieced out to the ol' garage for a blast of Design Master Primer Grey. Priming of course serves two purposes: First, it makes the kit more accepting of the acrylic paints, AND, priming really adds definition to the imperfections in the kit that we are gonna' want to putty up. Time's a wastin', so let grab that tube of Testor's Contour Putty (not the greatest, but the easiest to draw a thin bead from when working on these old styrene gems!) and start filling in the major seam defects. My method is to draw a thin bead down the seam, then dip a Q-Tip in standard nail polish remover and gently "roll" the tip over the putty until it conforms as much as possible to the mold of the kit. Later we're gonna' sand that bad boy and really smooth things out. But for now, as you can see by these pictures, this kit REALLY needed some serious putty work!

So there you have it, our lil' tiger is all primed, puttied, sanded, re-primed and ready and rarin' to go into painting phase!!! You can almost feel the finished product at this stage, so let's get goin' with part 3!!
Part 3: Painting up the basics
Those of you who know me, or at least know me through my tutorials, know that ol' Cal leaves the main part of the kits for last. I like cuttin' my paintin' chops on the bases and peripheral parts before movin' on to tackle the main event. With this kit I'm gonna' get started with the dual bases. My approach will be a layered one.
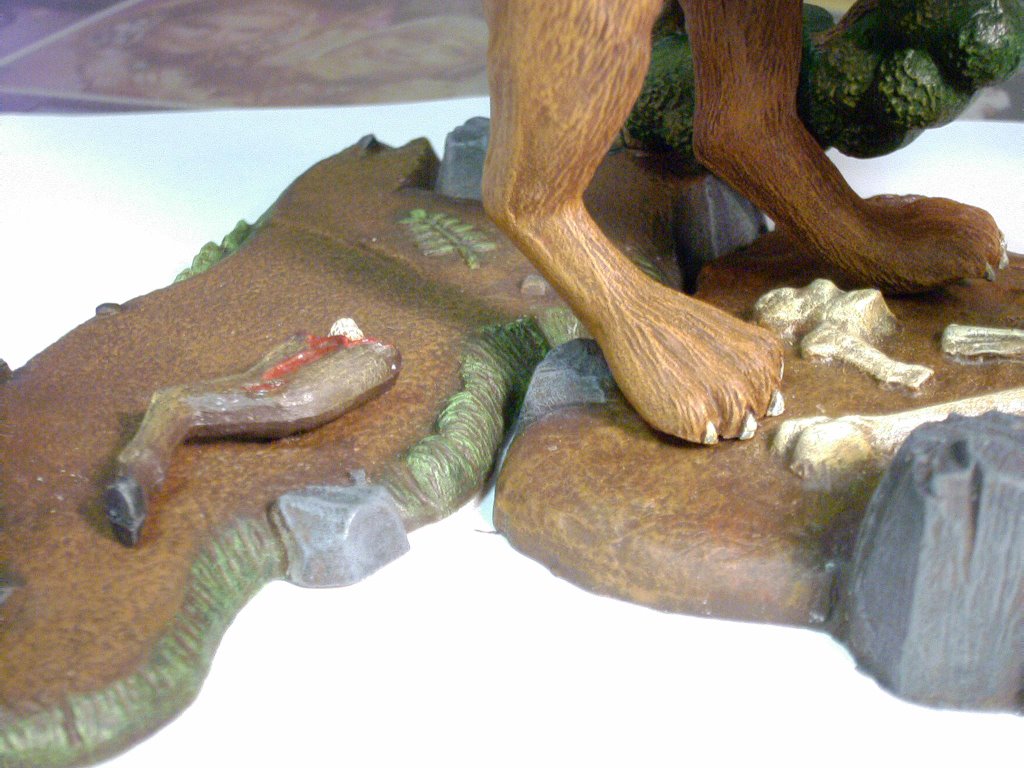
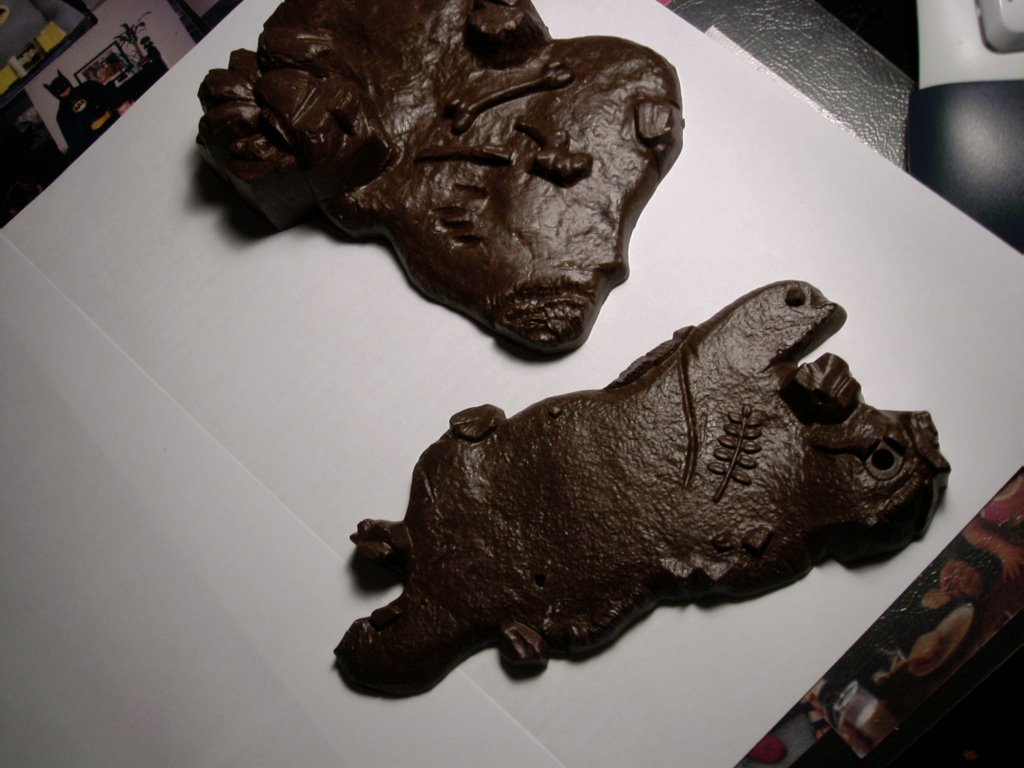 Because of the lack of real detail in the molding, there will be some issues with bringing out the realistic look of dirt, or bone, or rocks that are in the bases. I'm gonna' start by grabbin' my personal mixture of Cal's Brown. Can't really remember how I got this color, but boy-Howdy, I sure do like it. I will begin by painting both entire bases this dark brown color. Then, the fun really begins. Now we gotta' make our dirt look like earth, or at least earth as we think it was 2,000,000 years ago! I'm gonna' rely on a little technique I used on my Monsters of the Movies Frankenstein kit I did a while back and build up my earth tones with a
 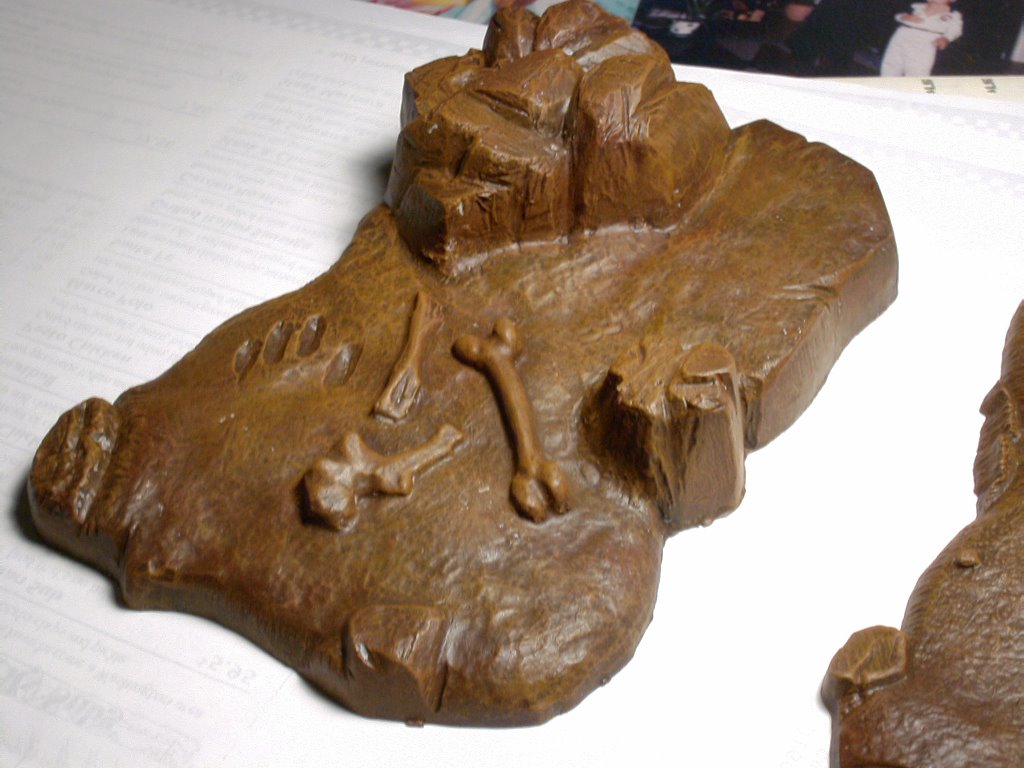 dry brush layer of Liquitex Burnt Sienna followed by a dry brush layer of Liquitex Raw Sienna. Whoah! As you can see by the pictures, this really brings out the soft detail in the plastic bases!!! Now, our next move is to use paint technique to separate the bone, grass and rock elements of the base.
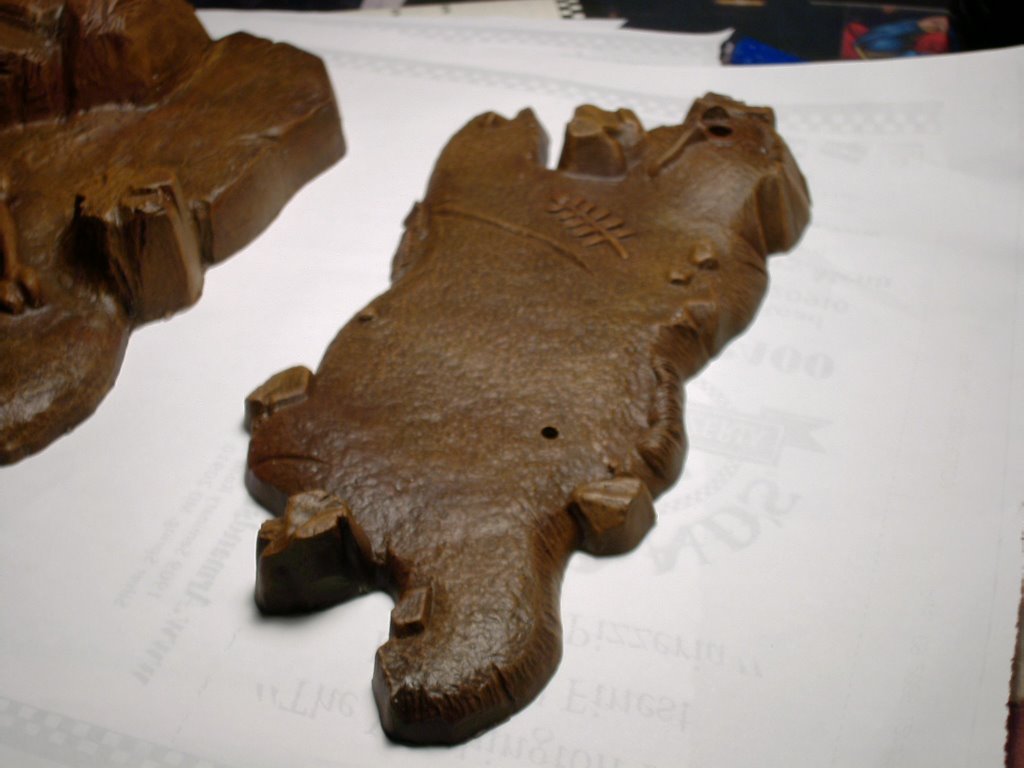
Now because I've already got the brown base, I can begin to work my rock textures up from there. This will make the rocks look as though they have come from the same earth area as the surrounding dirt. I begin by mixing up a medium dark grey color from Liquitex Medium Viscosity Black and White. I dry brush on a fairly heavy covering, hiding most of the brown, but leaving enough of the brown in the cracks to create a nice natural earth tone effect. From this point, I just keep lightening the grey mixture with white, applying lighter and lighter dry brush passes, and Oila! Realistic looking
 prehistoric rock formations!! For the small amounts of grass areas, I use the same technique with varying hues of green. Again I leave the brown base, start by dry brushing the grass with Liquitex Basics Phytalocyanine Green ( and no, I did NOT make up that name, it says it right on the tube.) and following with
  passes of lighter shades until I have effected a nice nature looking grass and leaf look. Now, all thats left to do is highlight them bones, dem bones, dem dry bones on the base and detail in the shrub that is in the corner, then, FINALLY, we move on to the main event, the Saber Tooth Tiger, and then this kit is in the history books!! Take a good look at these two pictures and you should get
 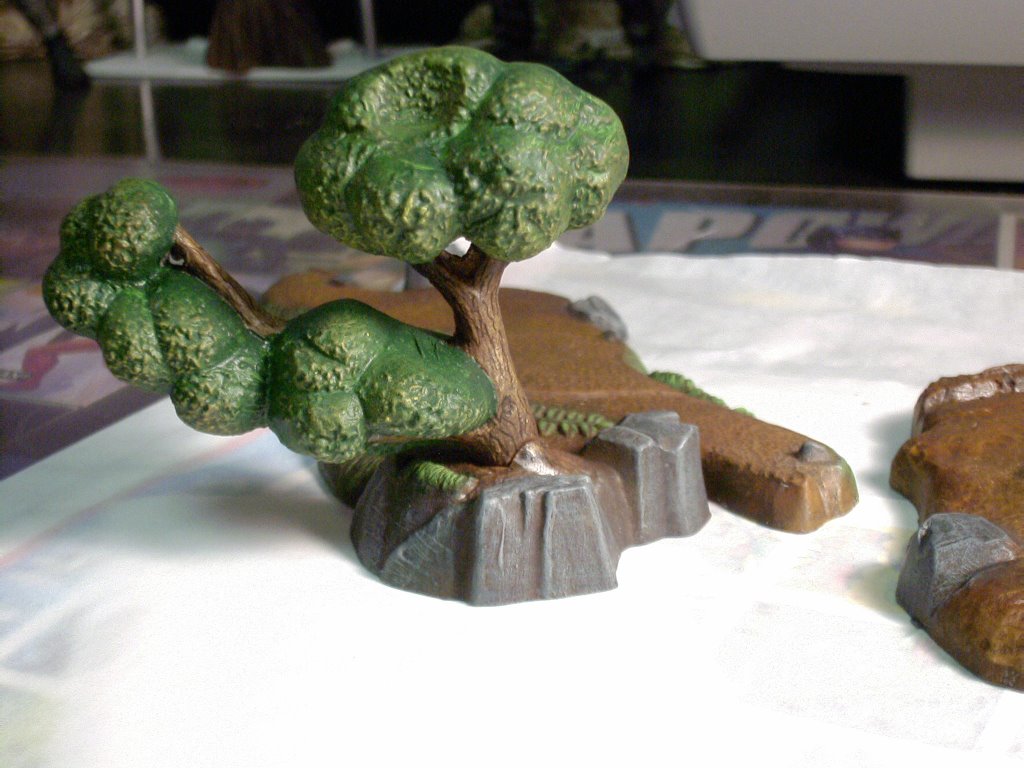 some idea of the kind of detail I'm puttin into this base! I even drew in bark lines on the tree with a gel pen to make it look more 3 dimensional. You
 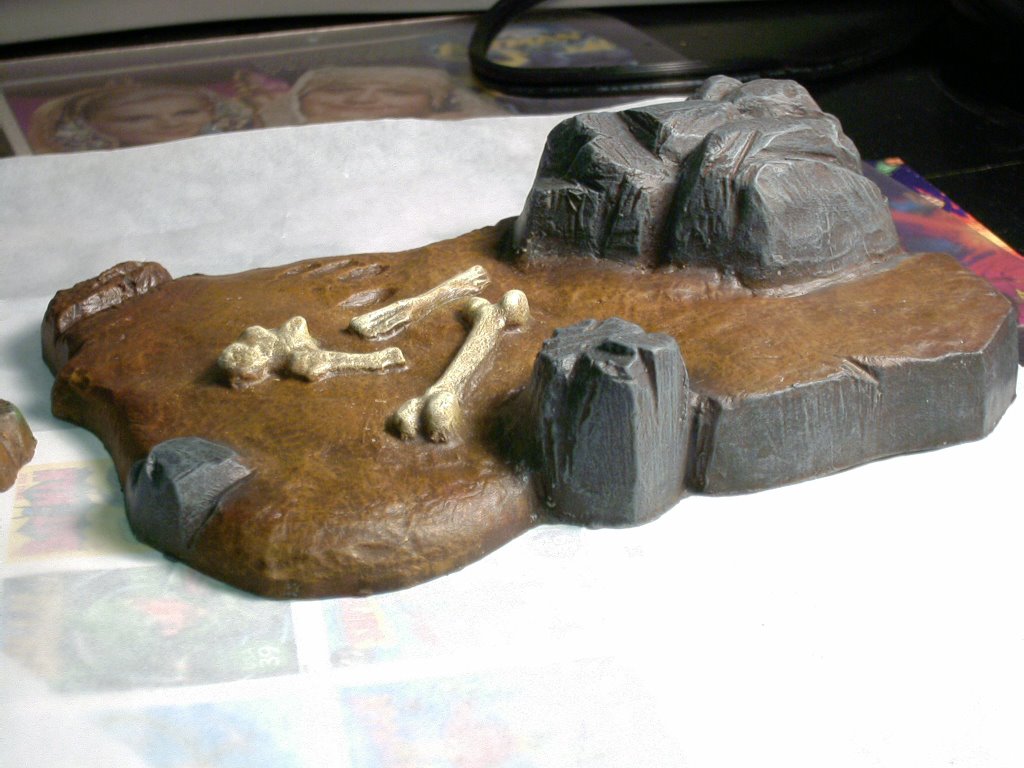 know those old Aurora kits weren't too big on the details. I also resurrected my dry bones look that I used when I built my Monsters of the Movies Frankenstien kit.
Finally it's time to tackle the main event!!! Tiger town here we come!!!
Catch A Tiger By The Tail!!
At long last we hit up the main event, and I'm gonna' be flyin' through the descriptions here, so hang on tight. Our main piece has already been puttied and
 primed for some time, so we can jump right in with the base coat. To begin to achieve the prehistoric look of the fur that I envision, I start with a solid base coat of Liquitex Raw Sienna. As previously discussed (ya' dig that Professor type speak!)these early Aurora styrene kits were long on style but a tad short on detail, so its gonna' take alot of layers and tricks to bring out what little detail this bad dog really has. To start drawing it out, I apply a thin wash
  of dark brown (my own blend)to the kit in sections, using a blow dryer after each application to speed up the drying and to help the wash settle in to the crevices of the kit. Then I go back and dry brush the entire thing again with another
 coat of Raw Sienna. Then? You guessed it, Sparky, I'm gonna' hit the whole thing one more time with the dark brown wash. AHHHHHH, as you can see by the pic's, this thing is really startin' to take shape!! Anything worth doing? Worth overdoing, right? You betcha', so to really get the fur flyin' I mix up a lighter
  shade of my original raw sienna base coat by adding a tad of Liquitex Butter Yellow. Then, in small sections, with a touch lighter than Richard Simmon's loafers, I carefully drybrush the raised fur areas of the entire kit. Knowing that the stomach area should be a little lighter, like the belly of most cats, I heavy up a bit on that area. Still the idea is to create realistic, 3D lookin' hair. Once
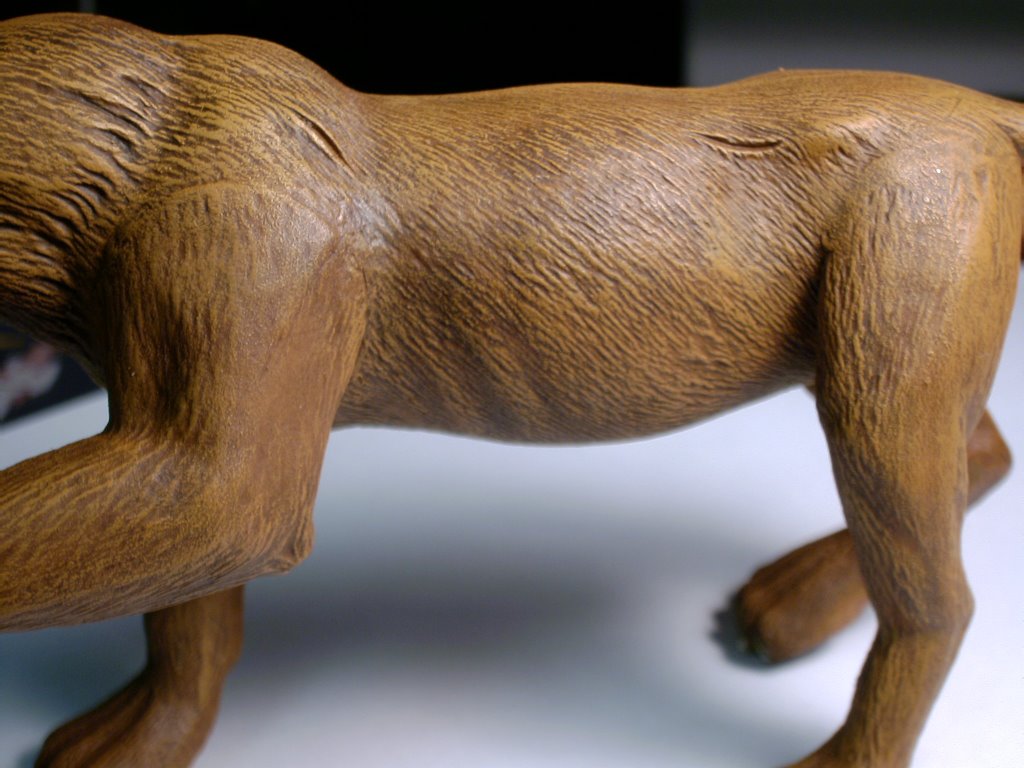 that dries, I lighten up the mixture once more by adding some Liquitex Antique White, then, even more judicially, dry brush areas of the fur again. On this pass I concentrate on lightening up the area around the nose and chin and again, heavy up on the belly to give that fur a distinct area. I totally opted not to go for the heavy white cheeks, belly and interior legs that I have seen done on many buildups of this kit. I just don't thing prehistoric cats would be colored the same
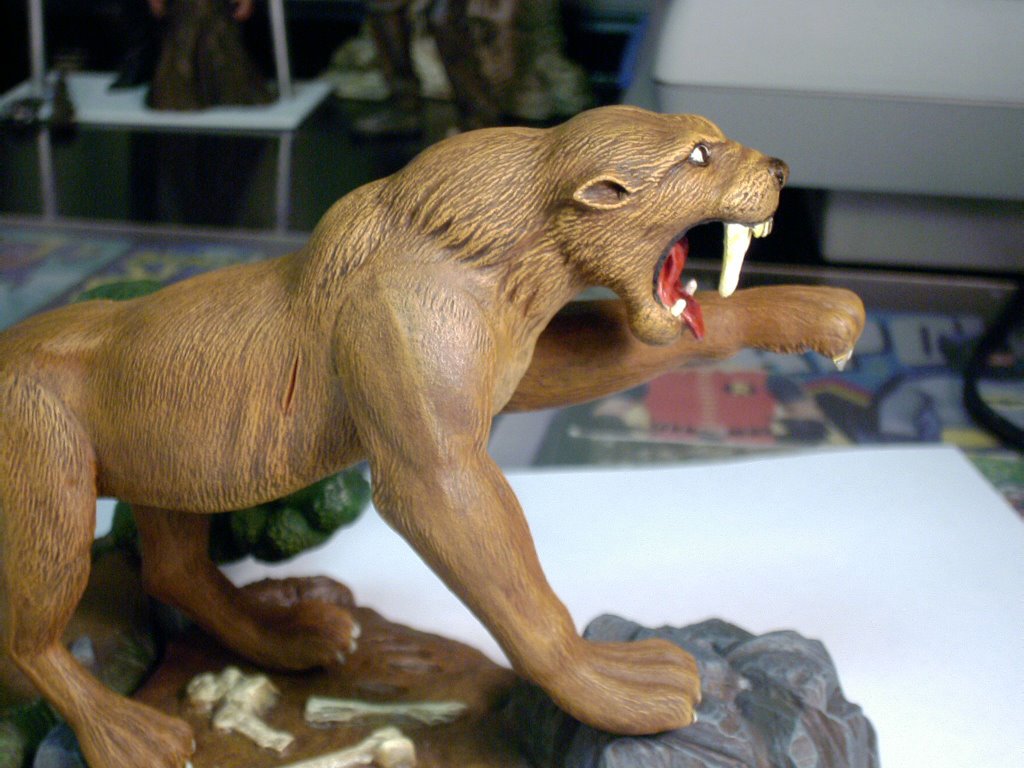
  way as domestic house cats. I wanted this bad boy to look fierce, and wild, and dirty from manging around in the mud and ook of the primordial ooze!!! And I don't know about you, but man, I think I got it!! The devil truly is in the details so I now try to take care of some of those pesky kit finishing items. First, I get out my mixture of black wash and apply several light coates to the pads of the feet. I leave enough of the original brown color showing through to give the impression of scuffed and calloused animal feet. I use this same wash on the thin
 line of lip area that is around the mouth, again leaving some original color showing through to add to the realism and depth of the mucous membranes. This impresses my so much that I also do the area around the eyes. Lastly, I tackle the toe nails. Starting with a coat of Butter Yellow, I lightly wash the area with my black wash. Then I double back with a dry, thin coat of the antique white. And I'm here to tell ya', these toenails look well worn and dangerous!!
Hittin' the Finish Line at LAST
It's always amazing to me how fast the end parts of a kit happen. It's like the flood gates just open and suddenly, miraculously, the kit is done. On this one, I admit I struggled. I'd never built an animal kit before, and the demands for realism intimidated me to some degree. But, ahead into the future we boldly went, and man, did I learn some neat new techniques. Let's just say I can't wait to build my next Wolfman kit!!! I definitely got some wild animal hair things going on in this one. So to finish up, I hit the tongue with my own unique blend, a kind of salmon color. I just hate it when people paints mouth parts primary red, it's just not lifelike at all. On an Ed Roth kit? Sure, go for it. But on a "historic" kit, you gotta' go for the real. So, I do the teeth and the eyes with Liquitex Antique White. Then, on the teeth, I wash them lightly with Liquitex Butter Yellow. The eyes get my classic black wash, just enough to take the edge off the white and add some strained realism to the orbs. From there, I wash the tongue with a light coat of Liquitex Burgundy, this brings out the texture of the taste buds and the folds and creases in the tongue to give it a real lifelike look. Lastly, mark in the pupils with a Le Plume Brown marker, seal all these areas with gloss varnish and.........doggone it!!!! We be done with this Cat.


So there ya' have it kids, delirious and a little bit out of touch with reality, we wave a fond farewell to this denizen of another age. Next up? We sink out teeth into Ed Roth's SUPERFINK!!
Labels: Figure Model Building and Painting., Hobby Modeling, Model Kit building
posted by Cal's Models at 2:49 PM
0 comments
![]()

